
Finished Product up front
I was lucky enough to have the shop at work fab the steel up for me. I've only welded twice in my life and they were slow so rather than doing a bolt-up design like I had planned they offered to weld everything up for me. It turned out great and the welds are super pretty, so I didn't bother having them grind them flush.


Basic plans for the headboard and footboard

After getting the frame home I made slats to support my mattress out of 2x4's. Could have gone thinner however I would have needed to have some sort of runner/brace running down the middle and I didn't want to be able to see that, hind sight though with the oversized comforter and not having a gap at the bottom you wouldn't be able to see it anyway.
After that with it still assembled I sprayed it down with some satin clear coat to prevent rust, satin seemed to be closest to the raw steel finish, really liked how it turned out.


The 1-1/2" thick slab as delivered, I ended up picking one that was a bit wider than I needed, but the narrower ones I could find all looked pretty terrible so I landed on this one.


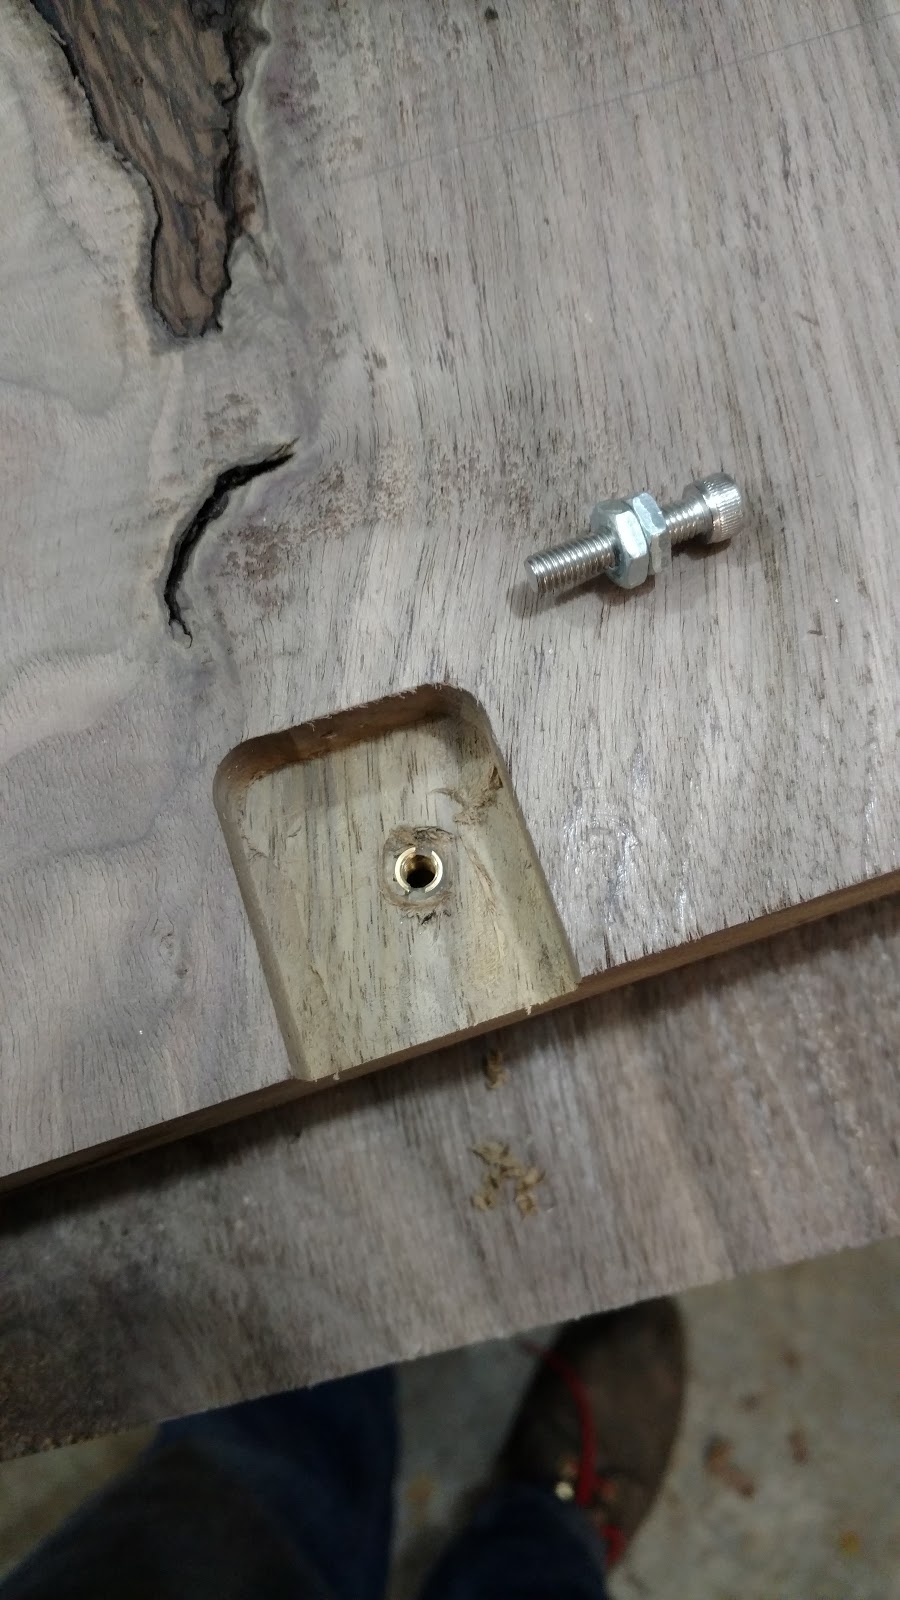
Since originally I had planned on using regular 3/4" stock the tabs were a bit deeper than necessary for the slab I routed some slots to bring the back side of the slab flush with the back side of the tube steel, this left ~1/2" inset from the face on the front side.

For the attachment of the metal tabs to the slab I used these threaded inserts. Thankfully I had tested it out on a scrap piece of wood to find the right pilot size when I found out that the slot they put in for you to screw these in was pretty fragile and broke off. My solution was to use a bolt and two nuts to drive the insert in and it worked out really well.

Just use the drill to drive this in
And back it out. Slots as you can see were all wider to account for the slab growing this summer

The slabs were fairly flat from the mill/planer my source used but there was some variation and spots that you could tell they had chips in their blades, so I broke out the No. 5 and cleaned it all up using very thin passes.

Working that wood.


Finish after scraping has a nice sheen to it already.


After a coat of Tried and True Danish Oil, things are looking good
Now for the footboard, this gave me some issues, I actually fully completed the headboard before doing anything to the footboard because I couldn't decide on what exactly to do.

I really wanted to incorporate this knot into the piece since it was so interesting, however you can see the tabs are riiiight on the edge of the sapwood/bark transition to allow clearance of the bump out.

To make matters worse, the back side curls in considerably. The line shown is where the face of the tab would be if I wanted to use the top for the face, I ended up using the bottom side as the face based on what each side looked like after planing. This actually allowed a bit more "meat" to go into.

This was the other option. While nice, it totally cuts off the knot which is a large reason I bought the slab in the first place.
I tested one of the brass inserts in an off cut piece of bark and it seemed pretty stable so long as it was in the dense section of bark so I plowed through and hoped for the best.

Thankfully these went smoothly, the other one was a bit more dicey but I didn't grab a picture of it. The bark was super soft so it took a very light touch to get to the proper depth without going through the bark on the other side.
Went through all the same steps of planing and scraping and applying oil for this piece. The knot made things interesting as the grain is going in all sorts of directions and I had to be careful not to get too much tear out.


After both sides dried to the touch all that was left was a bit of assembly.

Brought the pieces inside to fully cure then bolted everything together the next morning.


Moose hates getting his picture taken...
No comments:
Post a Comment